Author: admin

Fire-damaged building structure being assessed by a forensic engineer

Fire Damage Structural Property Assessments

A fire that has been extinguished is only the beginning of the evaluation process for a damaged structure. Before repairs, reconstruction, or demolition decisions can be made, a fire damage structural assessment must determine which building components retain their load-bearing capacity, which have been compromised, and which present an ongoing safety hazard. This determination requires far more than a visual walkthrough — it requires an engineering evaluation grounded in how different structural materials actually respond to sustained heat exposure.

How Fire Affects Different Structural Materials

Every structural material responds to fire differently, and a defensible assessment depends on understanding those differences. Wood chars from the exposed surface inward at a relatively predictable rate, leaving an insulating char layer that protects the unburned core — meaning a wood member can often retain significant strength even after visible charring, provided enough uncharred cross-section remains. Steel, by contrast, does not char or visibly signal distress before losing strength; structural steel begins to lose significant load-carrying capacity at temperatures well below what many people assume, and can soften and deform without the obvious visual cues that concrete or masonry provide. Concrete and masonry can spall — losing surface material explosively as trapped moisture converts to steam — exposing reinforcing steel to direct heat and reducing the effective cross-section of the member. Each of these failure mechanisms requires a different inspection and testing approach, consistent with fire investigation guidance such as the NFPA 921 Guide for Fire and Explosion Investigations.

Char Depth Analysis

For wood-framed structures, char depth analysis is one of the primary tools used to estimate the original size of a structural member and the duration and intensity of heat exposure it experienced. By measuring the depth of charring and comparing it to the estimated original dimensions of the framing member, an investigator can calculate the remaining, uncharred cross-section and assess whether that residual section retains sufficient capacity to carry its design loads. Char depth patterns also provide valuable cause-and-origin information, since char depth is generally greatest closest to the fire’s origin and decreases with distance, helping investigators correlate structural damage with the broader fire investigation.

Evaluating Steel, Concrete, and Masonry After Fire Exposure

Steel members require a different evaluation approach since fire-exposed steel may show no obvious external sign of the strength loss it has sustained. Investigators look for indicators such as distortion, deflection, connection damage, and discoloration patterns that can help estimate peak temperatures reached, and in some cases recommend material testing to evaluate residual strength directly. Any steel member that has visibly deformed under load during a fire should be considered compromised and evaluated for replacement rather than reuse, since the deformation itself indicates that the material exceeded its yield point at elevated temperature.

Concrete and masonry assessments focus on identifying spalling, cracking, and discoloration, which can serve as a rough indicator of temperature exposure, alongside sounding the surface to detect delamination and inspecting exposed reinforcing steel for heat damage. Where reinforcing steel has been exposed by spalling, both the concrete section loss and the potential strength reduction of the exposed steel must be factored into the capacity evaluation. In masonry structures, mortar joints and the masonry units themselves must be evaluated independently, since they often respond differently to the same heat exposure.

Distinguishing Structural Damage From Cosmetic Smoke and Heat Damage

Not every fire-affected building component has lost structural capacity. Smoke staining, surface discoloration, and minor heat blistering of finishes are frequently cosmetic issues that do not indicate a loss of structural integrity, and treating them as such can lead to unnecessary demolition and expense. At the same time, some of the most serious structural damage — softened steel, thermally cracked concrete, or wood framing with insufficient remaining cross-section — is not always obvious without close inspection. A qualified fire damage structural assessment separates genuine structural deficiencies from surface-level cosmetic damage, ensuring that repair scope is based on actual engineering findings rather than the visual severity of smoke and soot.

Determining Repair Versus Replacement

Once the extent of material-level damage has been established, the assessment turns to a broader evaluation of the structural system as a whole. This includes verifying that remaining, undamaged members can adequately support loads that may have previously been shared with now-compromised components, evaluating whether localized repairs can restore a member to its original design capacity, and determining whether more extensive replacement is warranted for the safety and long-term performance of the structure. These findings directly inform repair scope, cost estimates, and, in many cases, the resolution of an insurance claim tied to the loss.

Why a Qualified Assessment Matters

Because fire damage assessments carry direct implications for occupant safety, repair costs, and insurance claim outcomes, they demand a rigorous, standards-based methodology rather than visual estimation alone. EES Group’s engineers bring both structural engineering expertise and extensive field investigation experience to fire-damaged properties, evaluating wood, steel, concrete, and masonry systems to determine true structural capacity and provide clear, defensible findings for property owners, insurers, and legal proceedings alike. Learn more about our forensic engineering services.
Synthetic storm damage on a roof being inspected for fraudulent hail marks

Synthetic Storm Damage: Spotting Fraudulent Roof Claims

Not every roof claim submitted after a storm reflects damage the storm actually caused. Synthetic storm damage — physical marks intentionally created or altered to resemble hail or wind damage — is one of the most persistent challenges facing insurers, adjusters, and property owners alike. Distinguishing genuine storm damage from synthetic storm damage requires a trained eye, a systematic inspection methodology, and an understanding of how real weather events interact with roofing materials.

What Is Synthetic Storm Damage?

Synthetic storm damage refers to marks on a roof surface that mimic the appearance of hail impact, wind uplift, or other weather-related deterioration but were not produced by an actual storm event. These marks may be created deliberately using tools, or they may be pre-existing damage from age, mechanical wear, or unrelated causes that gets misattributed to a specific storm date in order to support an insurance claim. Either scenario results in the same outcome: a claim that does not accurately reflect the true cause and origin of the damage.

This is a significant issue in the insurance industry because roofing claims following hailstorms and high-wind events represent a substantial portion of total property claims each year. According to the Insurance Information Institute, property and casualty insurance fraud costs the industry tens of billions of dollars annually, a burden ultimately passed on to policyholders through higher premiums.

Common Methods Used to Simulate Storm Damage

Forensic investigators encounter a range of techniques used to create the appearance of storm damage. Striking shingles or metal panels with a hammer, the rounded end of a screwdriver, a golf ball, or a similar object can leave circular impact marks that superficially resemble hailstrikes. Dragging a stiff-bristled brush or blower across an asphalt shingle roof can accelerate granule loss in a pattern that mimics wind or hail-related wear. In some cases, individuals introduce damage to soft metal components such as flashing, gutters, or vent caps to create corroborating evidence intended to support a fraudulent roof claim.

What these methods have in common is that they attempt to replicate the visual signature of storm damage without replicating the physical mechanics that actually produce it. That distinction is exactly what a trained forensic investigation is designed to uncover.

Genuine Hail Damage vs. Synthetic Damage: Key Forensic Indicators

Authentic hail damage follows physical principles that are difficult to fake convincingly. Real hailstones strike a roof at an angle determined by wind direction and stone trajectory, producing impact marks with a directional consistency across an entire slope. Synthetic marks made by hand are typically more uniform in spacing, depth, and angle than the random distribution produced by falling ice.

Genuine impacts also displace granules and fracture the asphalt mat beneath in a manner consistent with a discrete, high-velocity impact — often with a soft or bruised feel when tested. Tool-made marks frequently show sharp edges, unnatural symmetry, or displaced granules that were removed rather than compressed into the mat. Collateral evidence matters as well: authentic hail large enough to damage a steep-slope roof will typically also damage soft metals nearby, such as gutters, downspouts, roof vents, and air conditioning fins, in a pattern consistent with the roof-level damage. The absence of that corroborating collateral damage is often a strong indicator that reported roof damage did not originate from the storm event in question.

Oxidation and weathering at the site of a mark provide another important clue. Fresh mechanical damage exposes underlying material that has not yet been exposed to UV and moisture, while damage that occurred months or years earlier will show weathering consistent with its true age — regardless of what date is listed on the claim.

Why Wind-Related Fraud Is Harder to Detect

While hail damage fraud often relies on visible impact marks, wind-related misrepresentation can be more difficult to identify because wind damage assessment already involves interpreting a range of legitimate failure patterns — lifted shingle tabs, displaced ridge caps, and torn underlayment. Investigators must correlate the reported wind event with verified meteorological data for the specific location, confirm that observed damage patterns are consistent with the wind speeds and directions documented for that event, and rule out pre-existing deterioration, improper installation, or normal wear as the true cause. A roof with a compromised nailing pattern or aged, brittle shingles can fail at wind speeds well below the threshold that would be expected to cause damage to a properly installed system — a distinction that is critical to an accurate cause-and-origin determination.

The Forensic Investigation Process

A rigorous synthetic storm damage investigation combines multiple lines of evidence rather than relying on visual inspection alone. This typically includes documenting the size, shape, spacing, and directional pattern of all damage present; comparing observed damage against verified storm data such as radar-confirmed hail size and wind speeds for the date and location in question; inspecting collateral components — gutters, downspouts, screens, and other soft metals — for corroborating or contradicting evidence; and evaluating the age and weathering characteristics of the damage itself. In many cases, a detailed roof-level inspection combined with historical weather verification is sufficient to reach a defensible conclusion about whether reported damage is consistent with the claimed storm event.

Because these findings frequently support insurance claim decisions, and sometimes become the subject of litigation, the investigation and reporting process must be methodical, well-documented, and defensible under scrutiny.

Protecting the Integrity of the Claims Process

Synthetic storm damage undermines a claims process that depends on accuracy for both insurers and legitimate policyholders. A qualified forensic engineering investigation protects all parties by ensuring that claim determinations are based on physical evidence rather than assumption. EES Group’s engineers apply established forensic methodologies — including verified meteorological data, material science, and decades of field investigation experience — to determine the true cause and origin of reported roof damage, whether that means confirming a legitimate claim or identifying damage that did not originate from the storm in question. Learn more about our forensic engineering services.
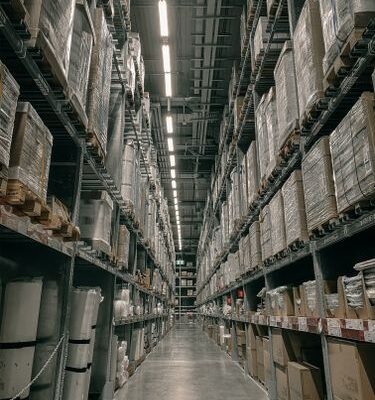
Commercial warehouse interior requiring dehumidification strategies

Dehumidification Strategies for Commercial Properties This Summer

Dehumidification Strategies for Commercial Properties This Summer

For commercial property managers and building owners, summer humidity control is not just a comfort issue — it is a building science and risk management imperative. Relative humidity above 60% sustained over weeks and months drives mold amplification, accelerates material deterioration, creates liability exposure from tenant and occupant complaints, and can result in costly remediation projects that dwarf the cost of prevention. This summer, implementing the right commercial dehumidification strategies is one of the most effective ways to protect your investment and avoid costly remediation.

Understanding the Sources of Indoor Humidity in Commercial Buildings

Commercial buildings face humidity loads from multiple simultaneous sources. Outdoor air infiltration through the building envelope brings in warm, humid summer air. HVAC fresh-air ventilation requirements — which in commercial buildings are typically higher than in residential applications — introduce significant latent load that must be treated before conditioned air is delivered to occupied spaces. Occupant density generates both sensible and latent heat. And moisture sources within the building itself — kitchens, restrooms, cooling towers, and process equipment — contribute to total humidity load.

Effective dehumidification strategy begins with identifying which of these sources is dominant in a given building. A building with high occupant density and significant fresh-air ventilation requirements needs a different solution than a large storage or light industrial facility with few occupants but significant infiltration through a leaky building envelope.

HVAC-Based Dehumidification

The primary dehumidification tool in most commercial buildings is the central HVAC system. Properly sized and maintained cooling equipment with adequate airflow across clean evaporator coils provides latent as well as sensible capacity. However, there are circumstances in which standard HVAC systems cannot maintain acceptable humidity levels even when operating normally. These include buildings with high fresh-air ventilation rates, buildings with high internal latent loads, and shoulder-season conditions where outdoor temperatures are mild enough that cooling demand is low — but humidity remains elevated.

For buildings with persistent humidity challenges, dedicated outdoor air systems (DOAS) with energy recovery ventilators (ERV) can treat fresh-air ventilation loads independently of space conditioning. This separates the latent and sensible loads, allowing the primary HVAC system to focus on space temperature control while the DOAS handles incoming humidity. Buildings that have undergone significant air-sealing or envelope improvements without corresponding HVAC modifications are often good candidates for this approach.

Standalone and Supplemental Dehumidification

In areas of a commercial building that are not served by central HVAC — or where HVAC cannot maintain adequate humidity control — standalone desiccant or refrigerant-based dehumidifiers provide supplemental capacity. These units are particularly valuable in crawl spaces, basement mechanical rooms, storage areas, server rooms, and spaces with frequent envelope penetrations that allow humid air infiltration.

Commercial-grade dehumidifiers are rated by pints-per-day removal capacity at standard test conditions. Selection should be based on the actual humidity load of the space at summer design conditions, not on unit size or price. Undersized units will run continuously without achieving target humidity setpoints, increasing energy consumption without solving the problem. A qualified mechanical engineer or building scientist can calculate design dehumidification loads and specify appropriate equipment.

Building Envelope as the First Line of Defense

Mechanical dehumidification is more effective — and less expensive to operate — when the building envelope limits humidity infiltration. Air sealing of common infiltration pathways — wall penetrations, electrical conduit entries, window perimeter gaps, roof-to-wall transitions, and foundation penetrations — reduces the outdoor humid air that mechanical systems must treat. Vapor retarders in wall and roof assemblies limit moisture diffusion through building components. Properly functioning exhaust systems prevent pressure imbalances that would otherwise draw outside air in through the envelope.

A blower door test or tracer gas pressurization test can quantify a building’s air leakage rate and identify major infiltration pathways. For commercial buildings with significant humidity issues, this diagnostic step is often revealing — identifying air sealing opportunities that are far less expensive to address than the ongoing energy and maintenance costs of running oversized dehumidification equipment to compensate for envelope deficiencies.

Monitoring and Documentation

Regardless of the dehumidification strategy employed, humidity monitoring is essential to verify performance. Low-cost data loggers that record temperature and relative humidity at configurable intervals can be placed in problem areas — crawl spaces, storage rooms, server areas, and building perimeter zones — to generate a continuous record of conditions. This data serves two functions: it confirms that the dehumidification strategy is achieving target conditions, and it provides documentation in the event that mold or moisture damage is later discovered and becomes the subject of an insurance claim or legal dispute.

EES Group’s engineers and industrial hygienists can assist commercial property owners with humidity load assessments, dehumidification system evaluations, building envelope diagnostics, and cause-and-origin investigations when moisture damage has already occurred. Proactive engagement before damage develops is always the most cost-effective path — but when damage does occur, accurate forensic documentation is essential to a fair outcome.

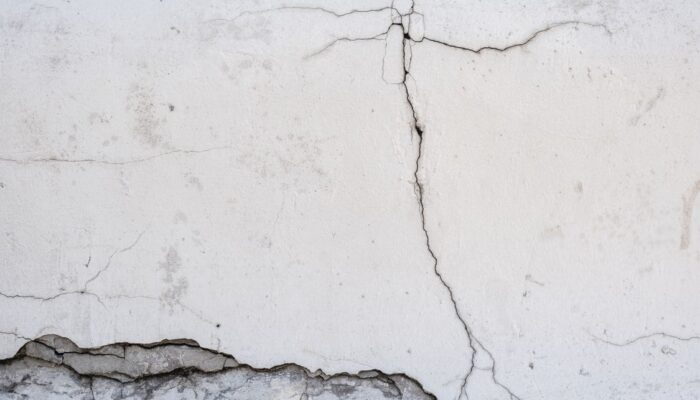
Cracked wall showing heat and humidity building damage

Heat and Humidity: How Summer Conditions Damage Building Materials

Heat and Humidity: How Summer Conditions Damage Building Materials

Buildings are designed to withstand a range of environmental conditions, but the combination of elevated heat and high humidity that defines summer in much of the United States places unique stresses on building materials. These stresses are cumulative — each summer season adds to the degradation of materials that began with the building’s first year of service. Understanding how heat and humidity building damage progresses helps property owners anticipate maintenance needs, recognize early warning signs of failure, and make informed decisions about repairs and replacement.

Wood: Expansion, Moisture Absorption, and Decay

Wood is hygroscopic — it absorbs and releases moisture in response to the relative humidity of surrounding air, a phenomenon well-documented by ASHRAE in its building envelope guidelines. In summer, elevated humidity causes wood to expand as moisture content rises. This seasonal movement is normal in small magnitudes, but in structural applications, repeated cycles of swelling and shrinkage cause cumulative mechanical stress. Joints open and close, fasteners loosen, and painted surfaces crack as underlying wood moves beneath coatings that cannot accommodate the deformation.

In persistently high humidity, wood can reach equilibrium moisture content levels that support fungal decay. Wood-destroying fungi require moisture content above approximately 19% by weight to initiate growth. In crawl spaces, attics, and other poorly ventilated areas, summer humidity routinely drives wood into this range. The damage is often invisible until structural members are physically tested or until surface staining and softening become apparent.

Masonry: Efflorescence, Spalling, and Joint Deterioration

Brick, concrete block, and mortar are all porous materials that absorb water. In summer, water absorbed during rain events is drawn back toward exterior surfaces by solar heat and evaporation — carrying dissolved salts with it. When water evaporates at the surface, these salts crystallize as white deposits called efflorescence. While efflorescence itself is primarily cosmetic, its presence indicates active moisture movement through masonry and often signals deteriorating mortar joints that allow water infiltration.

Thermal expansion of masonry materials during summer heat can also stress mortar joints beyond their capacity, accelerating deterioration. Control joints that are inadequate or improperly placed allow cracking to occur at random locations rather than at designed break points. Once cracks form, water infiltration during summer storms accelerates both the mechanical damage and the potential for interior moisture intrusion.

Roofing Membranes and Shingles

Low-slope roofing membranes and asphalt shingles are both significantly affected by summer heat. Rooftop surface temperatures can reach 150°F to 170°F on dark-surfaced low-slope roofs in direct sunlight. At these temperatures, asphalt-based materials soften and flow, fastener pullout resistance decreases, and seams in membrane roofing systems are subject to thermal stress. Repeated thermal cycling over successive seasons is a primary driver of roofing system fatigue and premature failure.

High humidity compounds this damage. Moisture trapped beneath roofing membranes — from condensation, vapor drive, or prior water intrusion — expands dramatically when heated, creating blistering and delamination of membrane layers. Once delamination occurs, the affected area loses its waterproofing integrity and becomes a point of active water infiltration during subsequent rain events.

Metal Components: Corrosion and Thermal Movement

Metal building components — flashings, fasteners, coping caps, curtainwall framing, and structural connectors — are susceptible to accelerated corrosion in the heat and humidity of summer. Galvanic corrosion occurs where dissimilar metals are in contact in the presence of moisture. High humidity maintains the electrolytic conditions that drive this process continuously during summer months. Zinc coatings on galvanized steel are consumed faster in hot, humid conditions than in cool, dry ones.

Thermal expansion of metal components is also more extreme in summer. Aluminum curtainwall systems, metal roof panels, and long runs of metal flashing all expand significantly on hot days. If these movements are not accommodated by properly designed expansion joints, they generate mechanical stress at attachment points — eventually cracking sealants, pulling fasteners, and compromising the weathertight integrity of the assembly.

Recognizing and Documenting Summer Damage

Many forms of summer heat and humidity damage progress slowly and do not become apparent until a triggering event — typically a significant rain storm — causes sudden, visible water intrusion. By this point, the underlying material degradation may have been building for years. Proactive inspection by a qualified forensic engineer or building envelope specialist can identify early-stage damage while remediation costs are still manageable.

EES Group provides condition assessments, cause-and-origin investigations, and expert analysis for property owners, insurers, and legal counsel dealing with summer heat and humidity damage. If you have observed signs of deterioration — efflorescence, paint failure, roofing blisters, or musty odors suggesting hidden moisture accumulation — a professional evaluation can establish the cause and scope of damage before conditions worsen.

Urban flooding from heavy summer storm rain

Summer Storm Water Intrusion: Protecting Your Building Envelope

Summer Storm Water Intrusion: Protecting Your Building Envelope

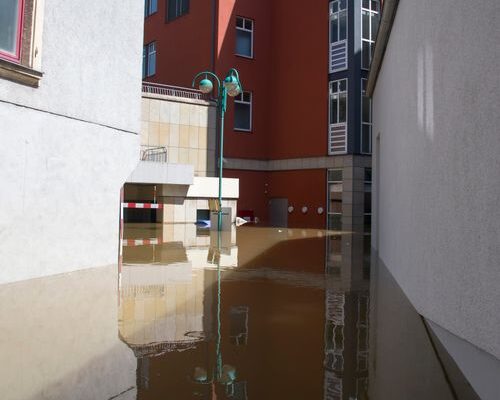
Summer in most of the United States brings not just heat and humidity, but intense convective storms — heavy, fast-moving rain events that can deposit several inches of water in a matter of hours. For buildings whose envelopes have minor deficiencies, these storms are not merely inconvenient; they are the triggering event for water intrusion damage that can cost tens or hundreds of thousands of dollars to remediate — a risk the FEMA flood risk assessment framework addresses for properties in high-precipitation regions. Understanding where and how summer storm water intrusion occurs is the first step toward protecting your investment and building occupants.

How Summer Storms Differ From Seasonal Rain

Summer convective storms, as documented by NOAA, are distinguished by high intensity and short duration. Unlike frontal rain systems that deposit water gradually over a wide area, summer storms can produce rainfall rates of one to three inches per hour in localized areas. These rates exceed the drainage capacity of many roof drainage systems, gutters, and site grading designs — creating ponding on roof surfaces, overflowing gutters, and sheet flow against foundation walls that were never intended to manage that volume of water.

Wind-driven rain adds another dimension. Summer thunderstorms frequently produce sustained winds of 30–50 mph with gusts exceeding 60 mph. At these velocities, rain penetrates building envelope assemblies that would remain watertight under vertical rainfall alone. Window and door perimeter sealants, EIFS and stucco cladding systems, and wall flashing details that perform adequately under normal conditions can allow significant water infiltration under wind-driven conditions.

Common Entry Points for Storm Water Intrusion

Roof penetrations — HVAC equipment curbs, pipe flashings, skylight perimeters, and drain assemblies — are among the highest-risk locations for storm water entry. Flashing details around these penetrations require periodic maintenance and are subject to degradation from UV exposure, thermal cycling, and physical disturbance during equipment servicing. A flashing that passed through last year’s storm season without incident may fail this season if it has reached the end of its effective service life.

Parapet walls on low-slope commercial roofs present a chronic vulnerability. Water that cannot drain quickly enough through roof drains during high-intensity rain events ponds against parapet walls and can overtop them or find paths through coping joints, through-wall flashings, and parapet cap intersections. Buildings without overflow drainage (secondary drains or scuppers) are at particularly high risk of structural overloading and water intrusion during extreme events.

At-grade and below-grade building components are equally vulnerable. Window wells, below-grade doorways, and basement wall penetrations can channel storm water directly into the building interior when site drainage is overwhelmed. Expansion joints in concrete slabs and foundation walls are common entry points that often go undetected until significant interior water damage has occurred.

Documenting Storm Water Intrusion for Insurance Purposes

When storm water intrusion occurs, documentation is critical. Property owners should photograph all affected areas before any cleanup or drying work begins, retain moisture readings from affected materials, preserve damaged contents, and document weather conditions at the time of the event using National Weather Service or private weather station data. This documentation is essential for insurance claims and for any subsequent dispute about whether the damage was caused by the storm event or by pre-existing conditions.

A qualified forensic engineer can provide cause-and-origin analysis that establishes the relationship between the storm event and the observed water intrusion — documenting whether entry occurred through a defective building component, through a previously adequate component stressed beyond its design capacity by an extreme event, or through a combination of both. This distinction can significantly affect insurance coverage outcomes.

Pre-Storm Season Inspections

The most cost-effective time to identify building envelope vulnerabilities is before storm season peaks. A professional building envelope inspection in spring or early summer can identify deteriorated sealants, compromised flashings, blocked drains, and site drainage deficiencies while repair costs remain manageable. EES Group provides building envelope assessments for property owners, facility managers, and insurance carriers — combining engineering analysis with thermal imaging and moisture detection to identify both visible and concealed vulnerabilities before they become claims.

Outdoor HVAC air conditioning unit affecting indoor humidity

How Your HVAC System Affects Indoor Humidity and Mold Risk

How Your HVAC System Affects Indoor Humidity and Mold Risk

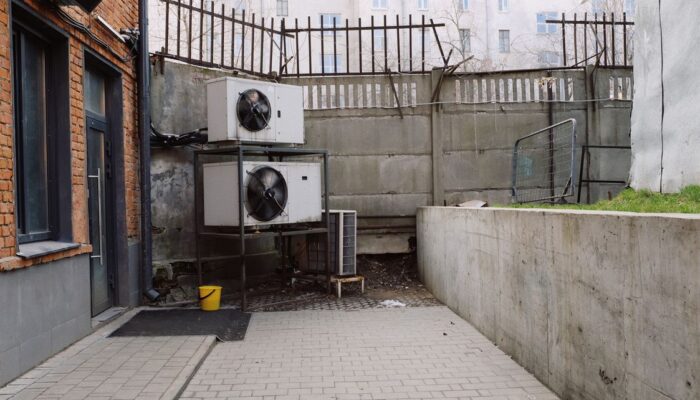
Most property owners think of their HVAC system primarily as a temperature control tool. But in terms of indoor air quality and building health, its role in managing humidity is equally — and in summer months, arguably more — important. The relationship between HVAC, indoor humidity, and mold risk is direct: an improperly sized, poorly maintained, or underperforming HVAC system allows humidity to climb into the range where mold amplification becomes a real and present threat to building occupants and structure alike.

How HVAC Systems Control Humidity

Air conditioning systems remove humidity through a process called latent heat removal. As warm, humid air passes over the evaporator coil, moisture in the air condenses on the coil surface and drains away — much like condensation on a cold glass of water. The air delivered back into the space is both cooler and drier. In properly designed and maintained systems, this process keeps indoor relative humidity within the recommended 30–60% range even during peak summer conditions.

The key phrase is “properly designed and maintained.” When either condition fails, the system’s ability to control latent loads — moisture — is compromised, even if it continues to control sensible loads like temperature. A space can feel cool at 73°F while its relative humidity sits at 70% or higher, creating ideal conditions for mold on walls, ceiling tiles, and inside mechanical systems themselves.

Oversized Systems and Short-Cycling

One of the most common — and most misunderstood — HVAC problems related to humidity is oversizing. A system that is too large for the space it serves will cool the space quickly and shut off before it has run long enough to adequately remove moisture. This pattern is called short-cycling. The thermostat is satisfied, but the humidity is not addressed.

Short-cycling is particularly problematic in humid climates and during the shoulder seasons of spring and fall, when outdoor temperatures are moderate but humidity remains high. Property owners who have had their systems “upgraded” to higher-capacity units without a load calculation may actually be creating worse humidity conditions than before the upgrade.

Dirty Coils and Restricted Airflow

Evaporator coils that are coated with dust, debris, or biological growth lose their ability to transfer heat efficiently. A dirty coil reduces both sensible and latent capacity — the system runs longer but accomplishes less. In extreme cases, restricted coils can cause the coil to freeze, temporarily halting humidity removal entirely. After defrost, a pulse of warm, humid air can be released into the ductwork.

Air filters that are not replaced on schedule have the same effect. Reduced airflow across the coil limits dehumidification. Annual coil cleaning and regular filter replacement are among the most cost-effective maintenance steps a property owner can take to preserve humidity control performance.

Duct Leakage and Humidity Infiltration

Leaky ductwork — particularly ducts routed through unconditioned attic or crawl space areas — introduces a second humidity pathway into the building. Supply-side duct leaks deliver conditioned air into unconditioned spaces, reducing system efficiency. Return-side duct leaks draw unconditioned, humid air into the return air stream, overwhelming the coil’s dehumidification capacity. Buildings with duct systems that have not been pressure-tested may be losing a significant fraction of their HVAC capacity to leakage.

HVAC Systems as Mold Amplifiers

When HVAC systems fail to control humidity adequately, they can also become mold amplification sites themselves. Evaporator coil pans that do not drain properly accumulate standing water. Ductwork lined with fiberglass insulation provides both the moisture and the food source mold requires. Mold colonies in HVAC systems distribute spores throughout the building with every operating cycle, making remediation significantly more complex and expensive.

If a building has experienced unexplained musty odors, occupant complaints of allergy or respiratory symptoms, or visible mold growth in areas near supply registers, the HVAC system should be inspected as part of any mold investigation. Treating surface mold without evaluating the HVAC system as a potential moisture source and distribution pathway is incomplete work.

Expert Assessment

EES Group’s engineers and industrial hygienists perform integrated assessments that evaluate both the building envelope and mechanical systems when investigating moisture and mold conditions. If your property is heading into summer with an HVAC system of unknown performance, a proactive evaluation can identify dehumidification deficiencies before they translate into mold growth and the associated health, liability, and remediation costs.

Empty basement showing crawl space moisture conditions

Crawl Space Moisture: Why Spring Is the Critical Season to Act

Crawl Space Moisture: Why Spring Is the Critical Season to Act

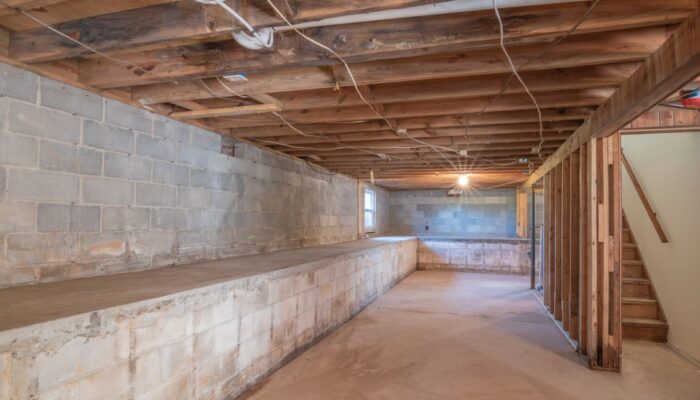
Of all the spaces in a building, the crawl space is among the most neglected — and among the most consequential. Tucked out of sight beneath floors, crawl space moisture accumulates silently during the spring months, creating conditions that threaten structural integrity, air quality, and occupant health. For property owners, spring is not just an opportunity to address crawl space moisture. It is often the last chance before summer heat and humidity transform a manageable problem into a major remediation event.

Why Crawl Spaces Are Especially Vulnerable in Spring

Several converging factors make spring the most dangerous season for crawl space moisture accumulation. Ground temperatures begin rising after winter, which accelerates evaporation of soil moisture into the crawl space air. At the same time, outdoor humidity climbs as spring storms move through. If the crawl space has traditional open foundation vents — a design approach that was standard for decades — warm, humid outside air flows freely into the space, where it contacts cooler structural surfaces and condenses.

This condensation cycle can occur daily throughout spring, depositing moisture on wooden floor joists, subfloor sheathing, insulation batts, and any organic debris present on the ground. Over six to eight weeks of repeated wetting, these surfaces can accumulate sufficient moisture to support mold colonization — even without any plumbing leak, flooding event, or roof water intrusion.

What Happens When Crawl Space Moisture Goes Unaddressed

The consequences of persistent crawl space moisture extend throughout the structure above. Because buildings operate under what is called the “stack effect” — air pressure differences that draw air upward from lower building levels — air from the crawl space migrates into living areas. Research conducted by the Advanced Energy Corporation found that up to 40% of the air in the first floor of a home may originate in the crawl space. Mold spores, volatile organic compounds from mold metabolism, and elevated humidity all travel upward with this air movement.

Beyond air quality, structural damage accumulates over time. Wood in contact with moisture above 19% moisture content by weight is susceptible to wood-destroying fungal decay. Joists and beams that experience repeated seasonal wetting without drying can develop decay pockets within two to three seasons. Repair costs for structural wood replacement are substantially higher than the cost of crawl space encapsulation or dehumidification.

Modern Crawl Space Moisture Control Strategies

The building science community has largely moved away from vented crawl spaces in favor of sealed, conditioned crawl spaces. This approach involves closing all foundation vents, installing a continuous heavy-gauge polyethylene vapor barrier across the entire ground surface and up the foundation walls, air-sealing penetrations, and either conditioning the space with supply air from the HVAC system or installing a dedicated crawl space dehumidifier.

When properly installed, a sealed crawl space maintains humidity levels consistent with conditioned living space — typically below 60% relative humidity year-round. This eliminates the condensation cycle that drives spring moisture accumulation. Studies show that sealed crawl spaces also improve energy efficiency, as floor assemblies are no longer exposed to outdoor temperature extremes.

Inspection Before the Season Peaks

Property owners and facility managers should schedule crawl space inspections in early spring, before outdoor humidity reaches seasonal highs. A qualified inspector should document existing moisture content readings on wood framing members, assess the condition of any existing vapor barrier, check for standing water or soil saturation, and identify any signs of current or prior mold growth.

EES Group’s engineers and industrial hygienists regularly perform crawl space moisture assessments and cause-and-origin investigations for insurance, litigation, and property management purposes. If your property has a crawl space that has not been professionally evaluated recently, spring is the right time to act — before conditions that are currently manageable become structurally significant.

Mold growth on a damp wall caused by spring humidity

How Rising Spring Humidity Creates Conditions for Mold Growth

How Rising Spring Humidity Creates Conditions for Mold Growth

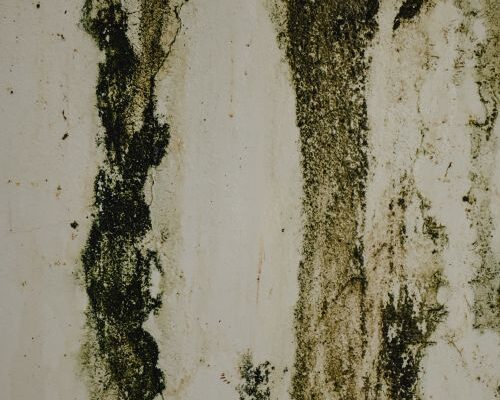
As temperatures climb and spring rains arrive, relative humidity levels inside and outside buildings rise sharply. For property owners and facility managers, this seasonal shift represents one of the most important — and most overlooked — risk factors for mold amplification. The link between spring humidity and mold growth is direct: elevated moisture levels fuel the germination and spread of mold spores in building materials. Understanding the relationship between humidity and mold can mean the difference between a clean building and a costly remediation project.

The Science Behind Humidity and Mold

According to EPA guidance on mold, mold spores are present in virtually every indoor and outdoor environment. They are not, on their own, a problem. The problem begins when spores encounter the right conditions to germinate and grow. The three primary drivers of mold amplification are moisture, a food source (organic building materials such as drywall, wood, and insulation), and temperatures between roughly 40°F and 100°F. Of these three factors, moisture is the one property owners can most directly control.

Indoor relative humidity above 60% provides sufficient moisture for many mold species to thrive on building surfaces, even without visible water intrusion. During spring, outdoor humidity spikes combine with cooler indoor surfaces — walls, windows, and concrete slabs that haven’t fully warmed after winter — to create condensation. That condensation, even if it evaporates quickly, repeatedly wets porous materials over days and weeks, creating the sustained moisture conditions mold requires.

Where Spring Humidity Causes the Most Damage

Certain areas of a building are especially vulnerable during high-humidity seasons. Crawl spaces are among the highest-risk zones: they receive ground moisture vapor from below, outside humid air through foundation vents, and often have little to no airflow. Without intervention, crawl space humidity can reach 80–90% during spring months, saturating wooden floor joists, subfloor sheathing, and insulation.

Basements present similar challenges. Uninsulated concrete walls allow cold surfaces to contact warm, humid air, producing condensation on wall faces and behind stored items. Attics are another concern — inadequate ventilation traps humid air against roof decking, accelerating mold growth on wood framing even when there is no active roof leak.

Humidity Thresholds to Monitor

The American Society of Heating, Refrigerating and Air-Conditioning Engineers (ASHRAE) recommends maintaining indoor relative humidity between 30% and 60%. Once humidity consistently exceeds 70%, the risk of surface mold on building materials increases substantially. Property managers should consider deploying humidity data loggers in high-risk areas — crawl spaces, basements, mechanical rooms, and storage areas — to track conditions throughout the spring and summer seasons.

Preventive Measures

Controlling spring humidity requires a layered approach. Mechanical dehumidification in crawl spaces and basements is the most reliable method, particularly when paired with vapor barriers on exposed earth floors. HVAC systems should be inspected and serviced before the cooling season begins so they are removing latent humidity effectively. Building envelopes — windows, door seals, foundation penetrations — should be checked for air leaks that allow humid outside air to infiltrate conditioned spaces.

When mold is suspected or discovered, a qualified industrial hygienist or certified mold investigator should assess the extent of growth and identify the underlying moisture source. Treating visible mold without correcting the humidity condition will result in recurring growth. A thorough cause-and-origin investigation not only documents what happened but provides the roadmap for a durable fix.

Working With a Qualified Expert

EES Group’s team of engineers and industrial hygienists has extensive experience evaluating moisture and mold conditions in both residential and commercial properties. Whether you need a proactive moisture survey ahead of the summer season or a forensic investigation following water intrusion or storm damage, our professionals can assess building conditions, identify sources of elevated humidity, and provide defensible findings that support insurance claims, litigation, or remediation planning.

Spring is the time to act. By the time visible mold appears on surfaces, the moisture problem has typically been ongoing for weeks. Early humidity monitoring and proactive building envelope maintenance are always less expensive than post-damage remediation.

construction project management importance

The Role of Project Management in Keeping Construction on Track

The Role of Project Management in Keeping Construction on Track

Behind every successful construction project is strong project management. While design and engineering set the foundation, project management ensures everything comes together smoothly from start to finish.

Construction projects involve multiple moving parts — contractors, timelines, materials, permits, and inspections. Without proper coordination, even small missteps can lead to delays and increased costs.

A good project management approach focuses on communication, scheduling, and accountability. It keeps all parties aligned and ensures that each phase of the project progresses as planned. This reduces confusion and minimizes the risk of costly errors.

Another key benefit is budget control. With clear oversight, project managers can track expenses, identify potential overruns early, and make adjustments before issues escalate.

In an industry where time is money, effective project management is not optional — it’s essential. It’s what turns a complex construction process into a streamlined, successful outcome.

preventative maintenance commercial property

How Preventative Maintenance Extends the Life of Your Property

How Preventative Maintenance Extends the Life of Your Property

Property ownership doesn’t end when construction is complete — in many ways, that’s when the real work begins. Preventative maintenance plays a critical role in protecting your investment and ensuring long-term performance.

Rather than waiting for something to break, preventative maintenance focuses on identifying and addressing issues early. This includes routine inspections, system evaluations, and minor repairs that prevent larger problems from developing.

One of the biggest benefits is cost control. Emergency repairs are almost always more expensive than planned maintenance. By catching issues early, property owners can avoid major disruptions and unexpected expenses.

Preventative maintenance also helps extend the lifespan of key systems and structures. From roofing and drainage to structural components and utilities, regular upkeep ensures everything continues to perform as intended.

In today’s environment, where replacement costs are rising, protecting what you already have is more important than ever. A proactive maintenance strategy not only saves money — it preserves the value of your property over time.